How to Create a Digital Portfolio That Is Free and Serverless

Chances are most of us have stumbled into someone’s digital portfolio. This can range from book authors to IT professionals, it’s pretty universal as everyone can benefit from it. Is it needed, probably not but it does help quite a bit in showcasing your skills and who knows, perhaps it could be the difference between you getting an interview and/or a phone call. Let’s say you decided you want a digital portfolio, you’re probably wondering how to go about getting started? Does it cost money? Is it affordable? Do I have to be a programmer? Do I need to maintain a server? What if I told you can do it all for free, with no programming skills, and virtually zero maintenance. All you need is some patience, a little bit of guidance and some spare time. Sounds pretty neat right? Well if that interest you let’s dive into what it takes to make a digital portfolio.
Note: If you get lost or want to look at the final example code, check out the code respository
Getting Started
In order to make this happen we will use the following pieces of technology.
- A domain name (optional)
- Your favorite static site framework (we will use Hugo)
- Netlify
- Github or Gitlab
- A text editor It helps it if you are familiar with git beforehand and have git configured. Here is a guide for setting up git with Github, and here is one for Gitlab. There are also numerous videos on Youtube that walks you through how to get started if you are a visual learner.
Next we need to make a decision, do we want a domain name, such as example.com or do want to leverage a generic name that might not be as human friendly? I recommend getting a domain name, plus domain names are not too expensive, about $10–12/yr. You can sacrifice two trips to Starbucks this week, and you’ll already have it paid off ☕️
If you want help in acquiring a domain name read the next section, otherwise skip to the “Install Hugo” section.
PS: If you already have a domain, ensure to change the preferred name servers (NS) to Netlify’s name servers. This is demonstrated in the next section.
Getting a Domain Name
What’s awesome these days is that you can buy a domain name from various providers, and better yet, delegate the management of the domain name to another provider. If you haven’t already, log into Netlify and/or create an account (free). Next, click on domains.

This will take you to a landing page. In this landing page there is a search bar, type the domain name you would like to acquire or transfer if you already own one. After you have come up with a domain name, type it in and Netlify will verify if it already exists. If the domain name is available you will be presented with the option to purchase. Keep in mind that you have to add a payment method before you can purchase the domain.
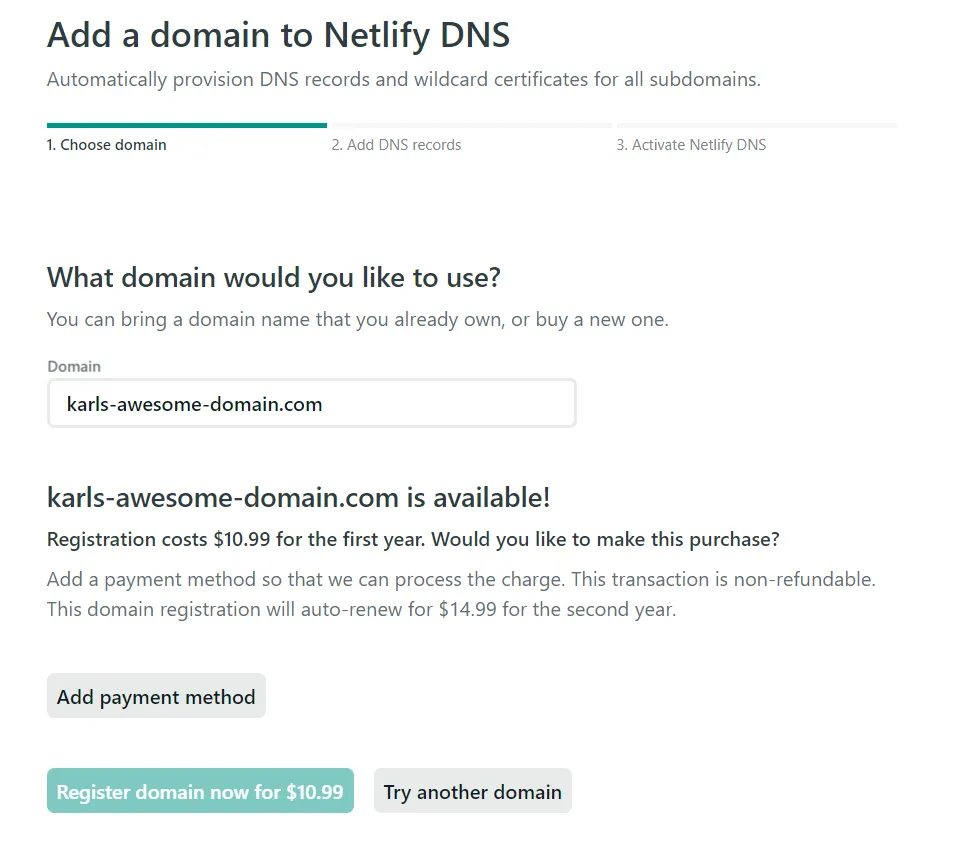
Go ahead and purchase the domain and take the default settings in the following screens. We will revisit the domains page later for HTTPS.
For those of you that already have a domain and want to transfer it, follow the same process and update the name servers. Below is an example of my personal domain that I purchased through Goolge domains. As you can see below, Netlify has four different name servers. These values need to be added in Google domains, or wherever your domain is registered.
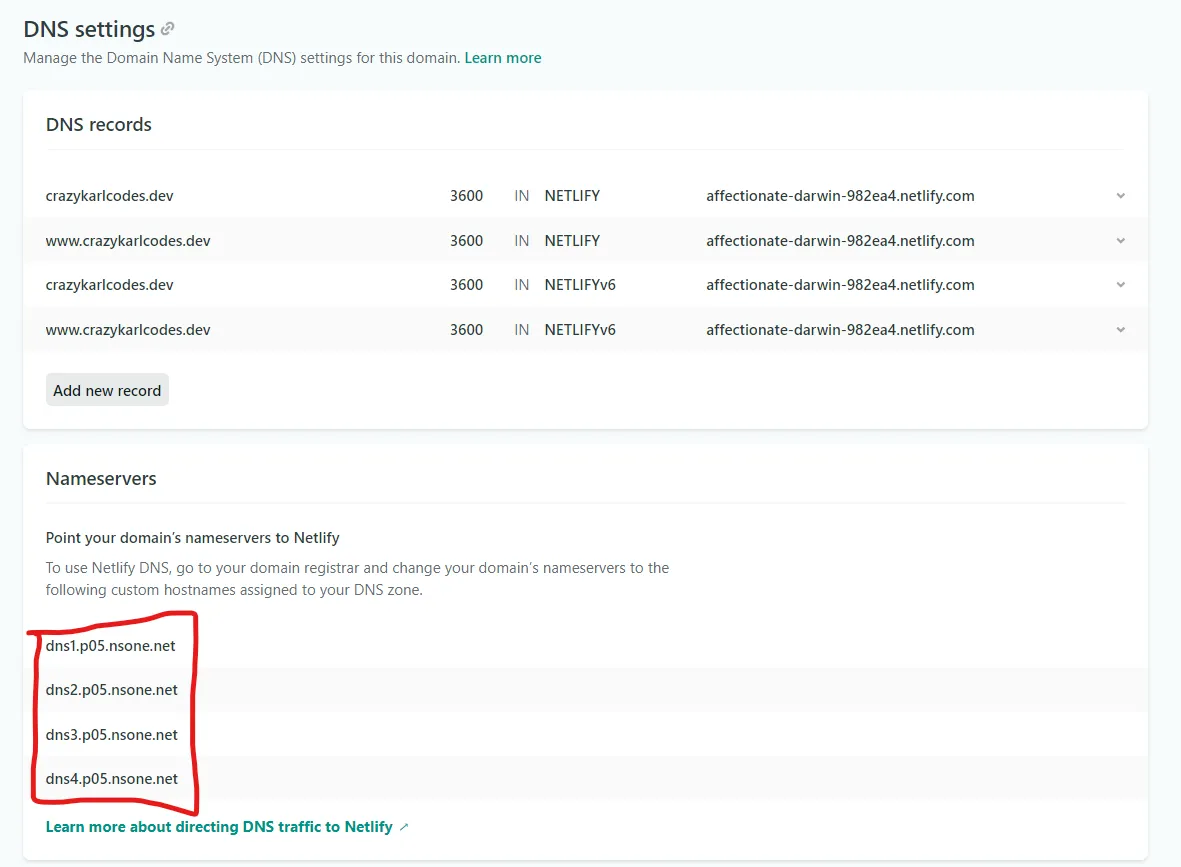
*Example of a domain registered through an external provider*
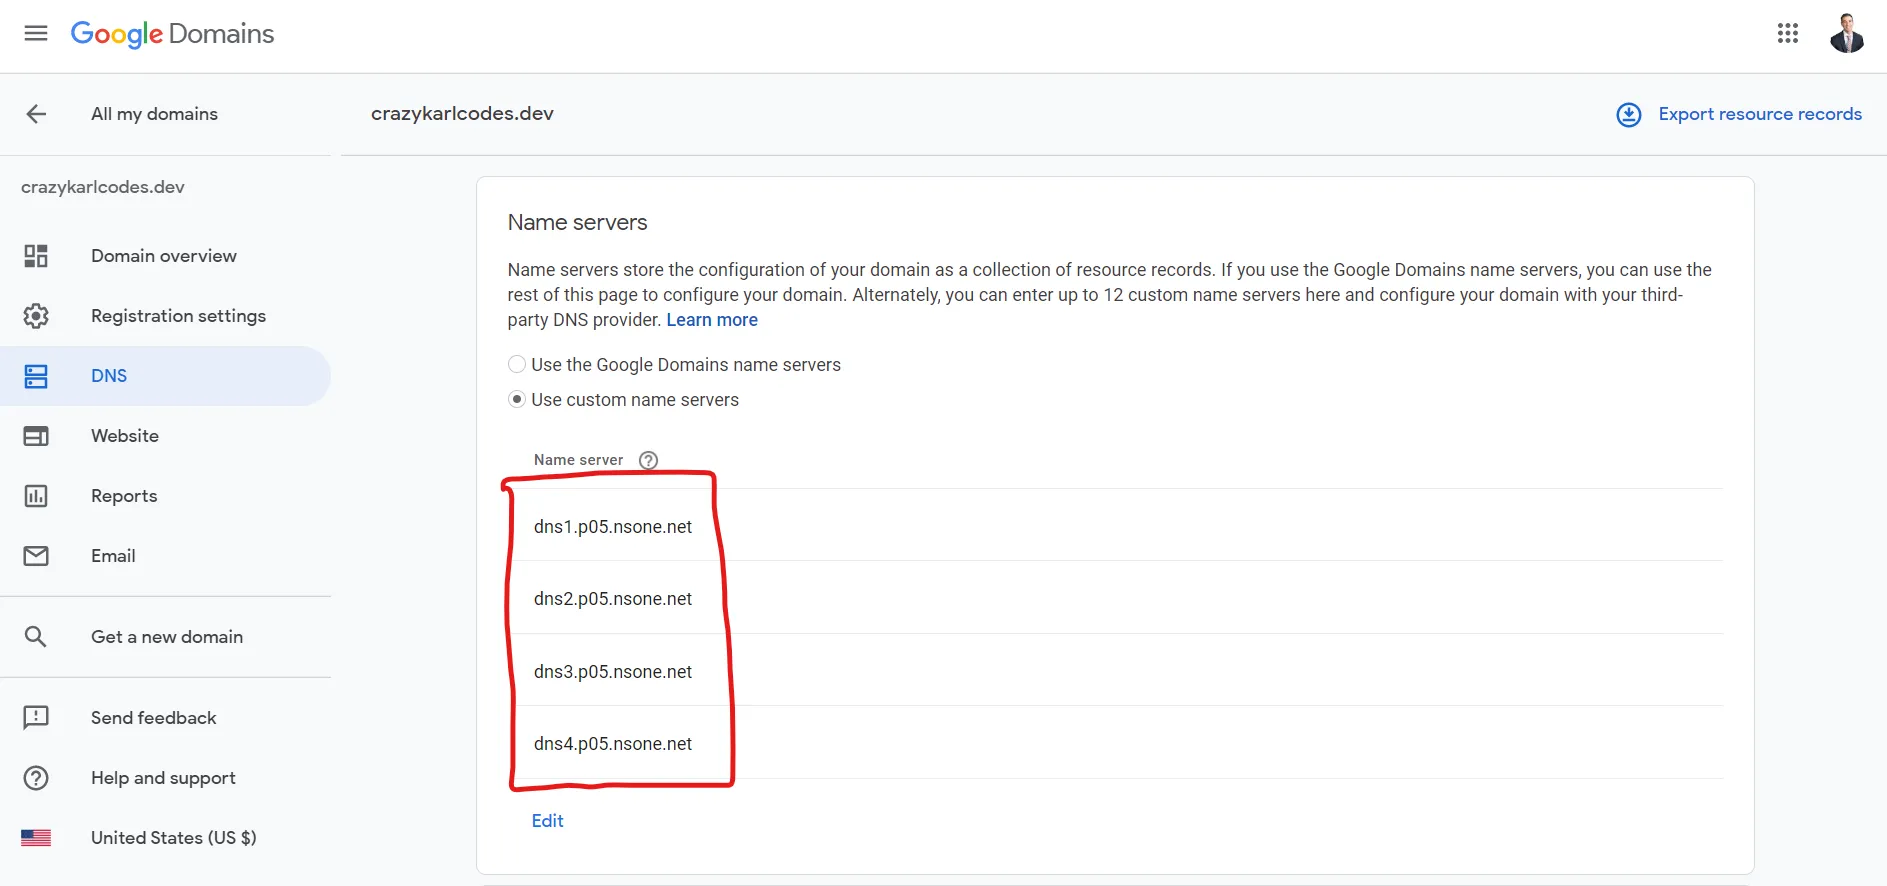
*Example of the name servers being updated in the external provider*
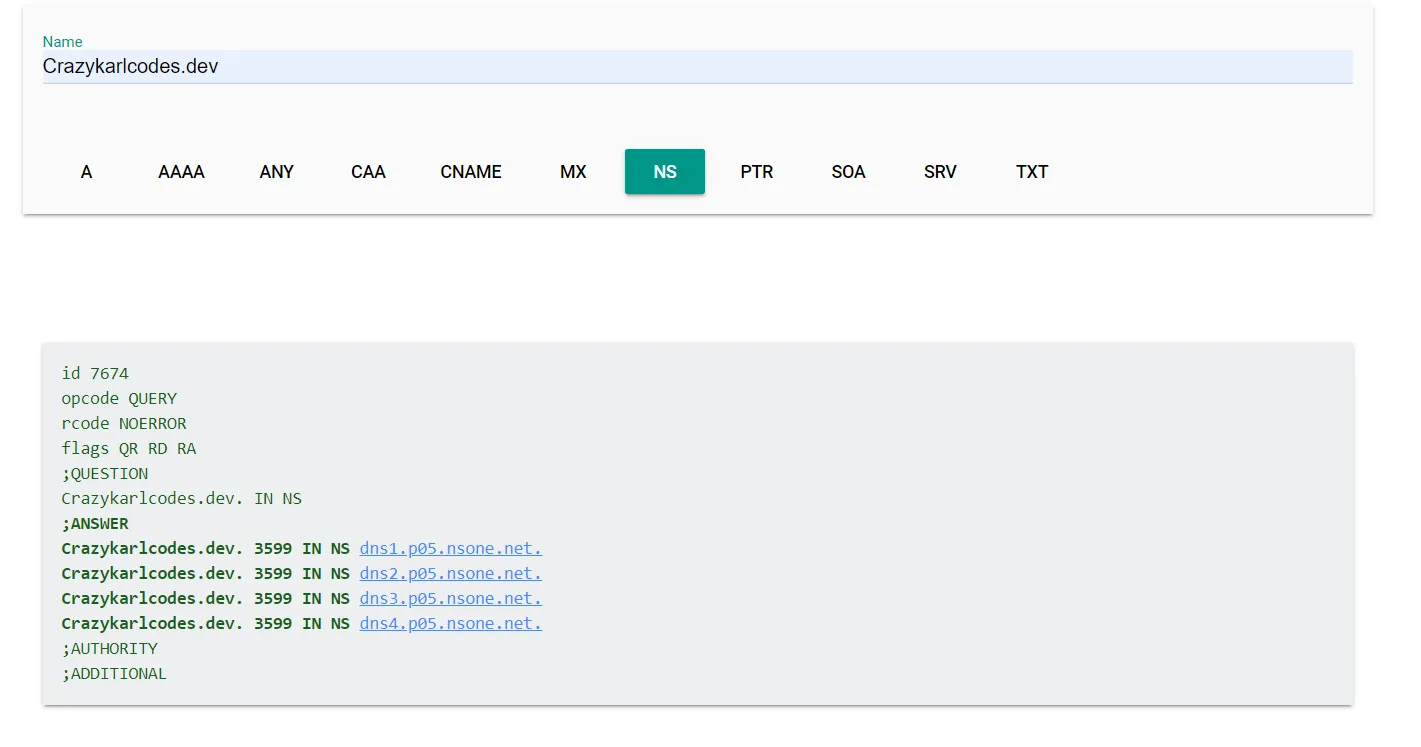
Once you have completed this step it might take few minutes to update. I’ve seen it take as short as 30 seconds to 10 minutes. You can verify this through G Suite toolbox , if everything was done correctly you should see the Netlify name servers in the results field.
Install Hugo
At this point we are ready to start playing with Hugo. If you’re not familiar with Hugo, don’t sweat it, just know that it’s a static site framework that does a lot of heavy lifting for us.
To install Hugo, visit https://gohugo.io/getting-started/installing/ . Installing Hugo can be a bit overwhelming if you don’t come from a technical background, start by reading this section of the installation guide. There is also a pretty handy install YouTube video if you are on a Windows, or a Mac.
Open up command prompt, gitbash, or any terminal tool of your preference. You can verify Hugo installed correctly if the version command responds back with version information.
|
|
With Hugo installed, let’s go ahead and make a Hugo project. Go to a location on your system where you want the Hugo project stored. This part is important as the command we are about to issue will create a folder structure in the current directory.
The site command requires a name parameter as it will create a folder with that name
|
|
We now have a folder titled my-portfolio-example. The next step is to get everything ready for git.
Create a git repository
Assuming you have git installed, let’s go ahead change the directory to the Hugo project. If you’re on Windows you can use gitbash, command prompt, or WSL. If you have not configured git yet go ahead and add your user name and email.
|
|
Let’s go ahead and create a repository in Gitlab.com. If you have not created a Gitlab account, go ahead and do so now (free). If you prefer Github, that’s fine too, either one works. The end goal is to create a git project.

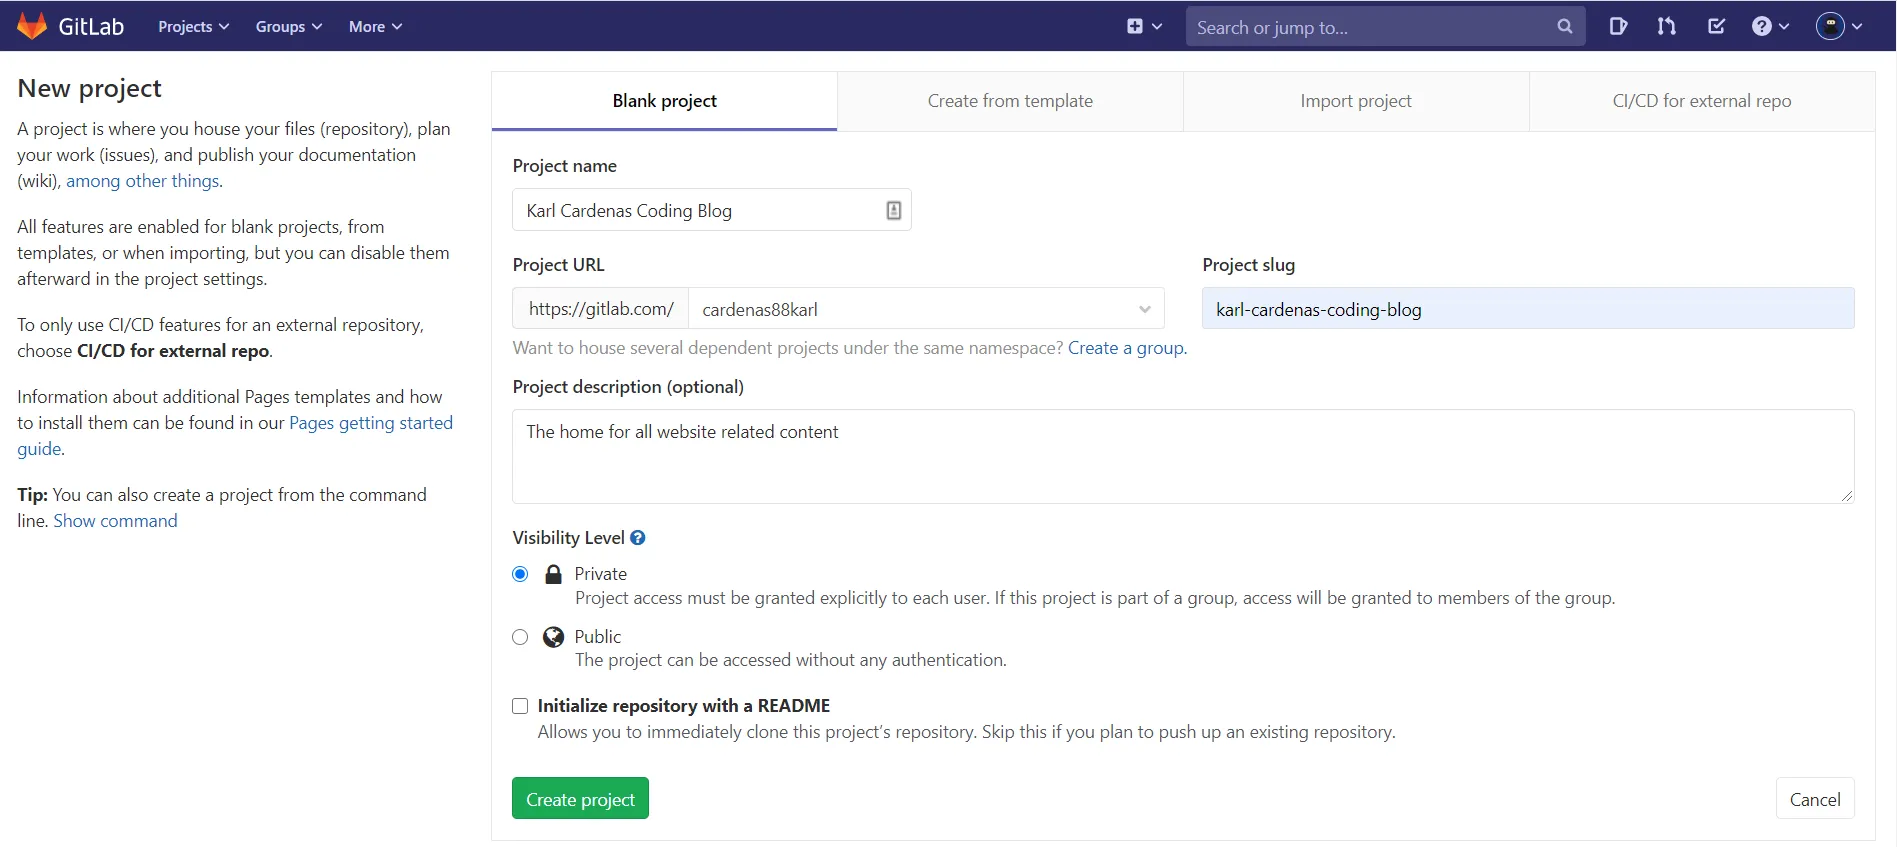
Click on New Project
Once you click on “New Project” it will take us to a screen where we will be asked to provide a project name and a description followed by visibility settings. Go ahead and set your visibility to Private. Click on “Create project” once you have your name and description finalized.
The next screen is the home of your project. Because there is no content in this project yet, we are presented with some commands to help us get started. We will use the “Push an existing folder” set of commands.
Note: You will be prompted for username and password if you have not configured Gitlab with an SSH key. Here is a job aid for configuring SSH for Gitlab.com
|
|
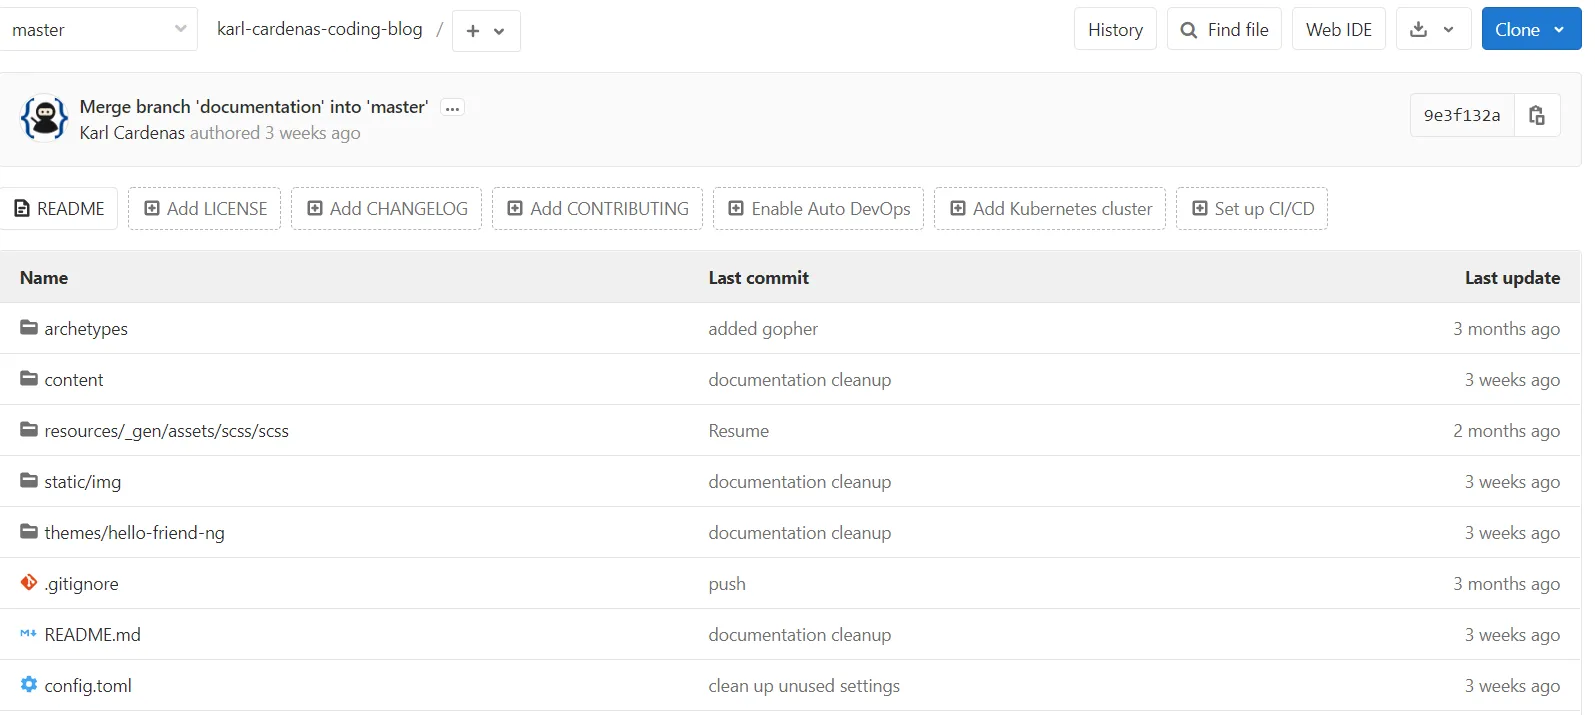
Example of the what it looks like after the content is uploaded
The next part is selecting a Hugo theme, Hugo has a strong community with creative individuals that have created copious publicly available themes for all of us to consume and customize to our liking. Oh and majority of them are free 🆓
Pick a website theme
This is where the fun begins, picking a theme for your website. Let’s pick a theme for the portfolio website. Visit https://themes.gohugo.io/.
I really like the hello-friend-ng theme, so I’m gonna go with that one. Go into the theme and click on “Download”, this will take us to its Github location, in other words, where the source code resides. Theme creators will normally populate the README file with lots of valuable information, this is important when it comes to customizing your website and will be frequently referenced.
If we go through the README, the author articulates how to consume the theme, in fact the author gives us two options. To either direct copy of the theme folder into our project OR to consume it as a git sub-module. There are pros and cons to both methods but for ease of use, let’s go with the git sub-module option. Issue the following command to add the theme into our existing Hugo project.
|
|
Now that we have the theme available, let’s change the config.toml and update it so that it picks up the new theme. The easiest way for you get started and start to understand how Hugo works is by replacing the content folder and resources folder with the ones found inside theme/hello-freind-ng/exampleSite. Below are the copy steps.
- Replace the
content/folder with the foldertheme/hello-friend-ng/exampleSite/content - Replace the
resources/folder with the foldertheme/hello-friend-ng/exampleSite/resources - Replace the content of
config.tomlwith what is in the config file found intheme/hello-firend-ng/. Inside theconfig.tomlset thebaseUrl = "".
Once you have this done let’s issue hugo server -D and open up our web browser and type in localhost:1313
Tip: Visit the example repo if you got lost here to see the end result
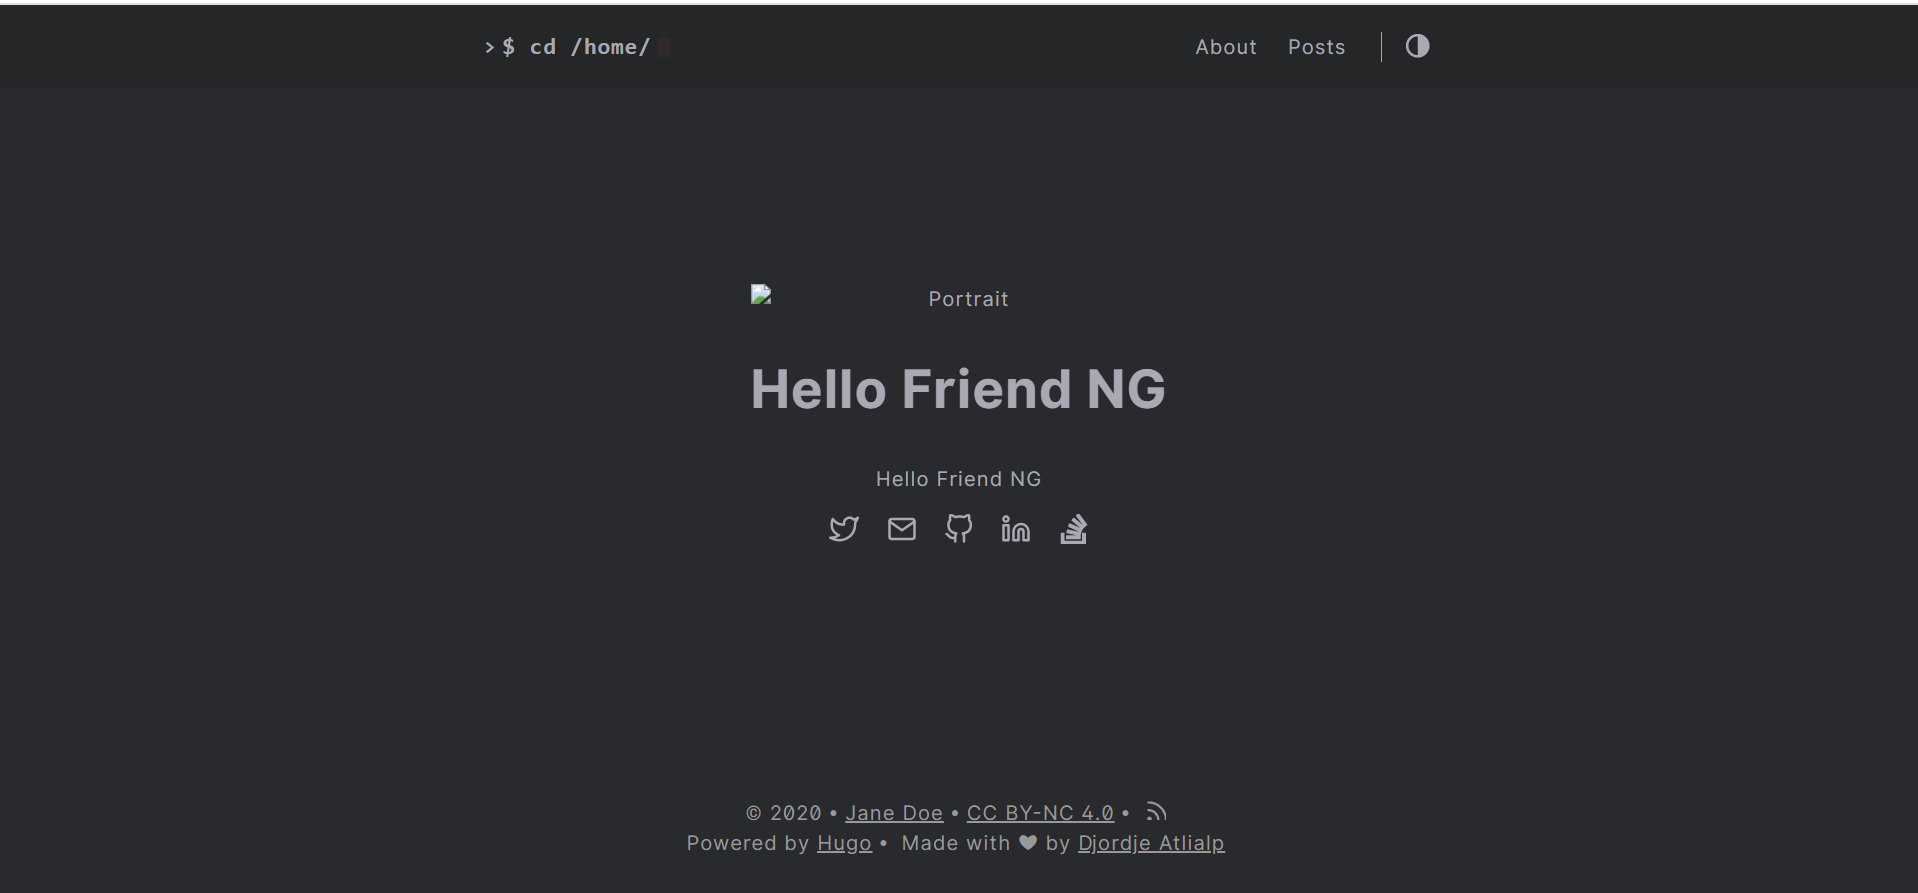
What you should be seeing upon completing all the steps thus far.
Congratulations if you have made this far! I’m sure you’re wondering how to add content, pictures etc. So let’s dive into the Adding Content section.
Adding Content
At this moment, the only content we have is from the original author of the theme. After all, we did copy the content folder from the exampleSite folder inside the theme. So let’s add a new page to the blog category. In order to do that we will leverage a Hugo command but first let’s stop the server Ctrl + C and open up your code editor.
Let’s issue the command hugo new content/posts/new-car.md. This command creates a new file named new-car.md inside the content/posts/ folder. We are creating the new file in this location because that’s where all blog post articles reside. Also, take note of the file extension .md, this is markdown. If you’re not familiar with markdown take comfort in knowing that it’s a syntax that is incredible simple to learn and use for designing documents.
If you open up new-car.md in your text edition you will see that in comes pre-populated with some content
|
|
This content is derived from the archetype dictated in the theme. Archetypes are pre-configured front matter. The important take away here is that the title is defined here, and that the draft setting is set to true. The draft setting should be set to false once the content is finalized. Otherwise, it will not be generated during the build process.
Let’s add the following content:
|
|
All we are adding is a main heading and some random Latin text (Lorem Ipsum) and a link to a YouTube video using Hugo’s build in short-code for Youtube videos. Hugo has some pretty neat build in capabilities called short-code. I recommend becoming familiar with these to make your life easier.
Let’s change the the draft setting to false (at the top of the newly created page) and boot up our server hugo server -D . You should now be able to view your new content by navigating to the posts tab and click on the new entry titled “New Car”.
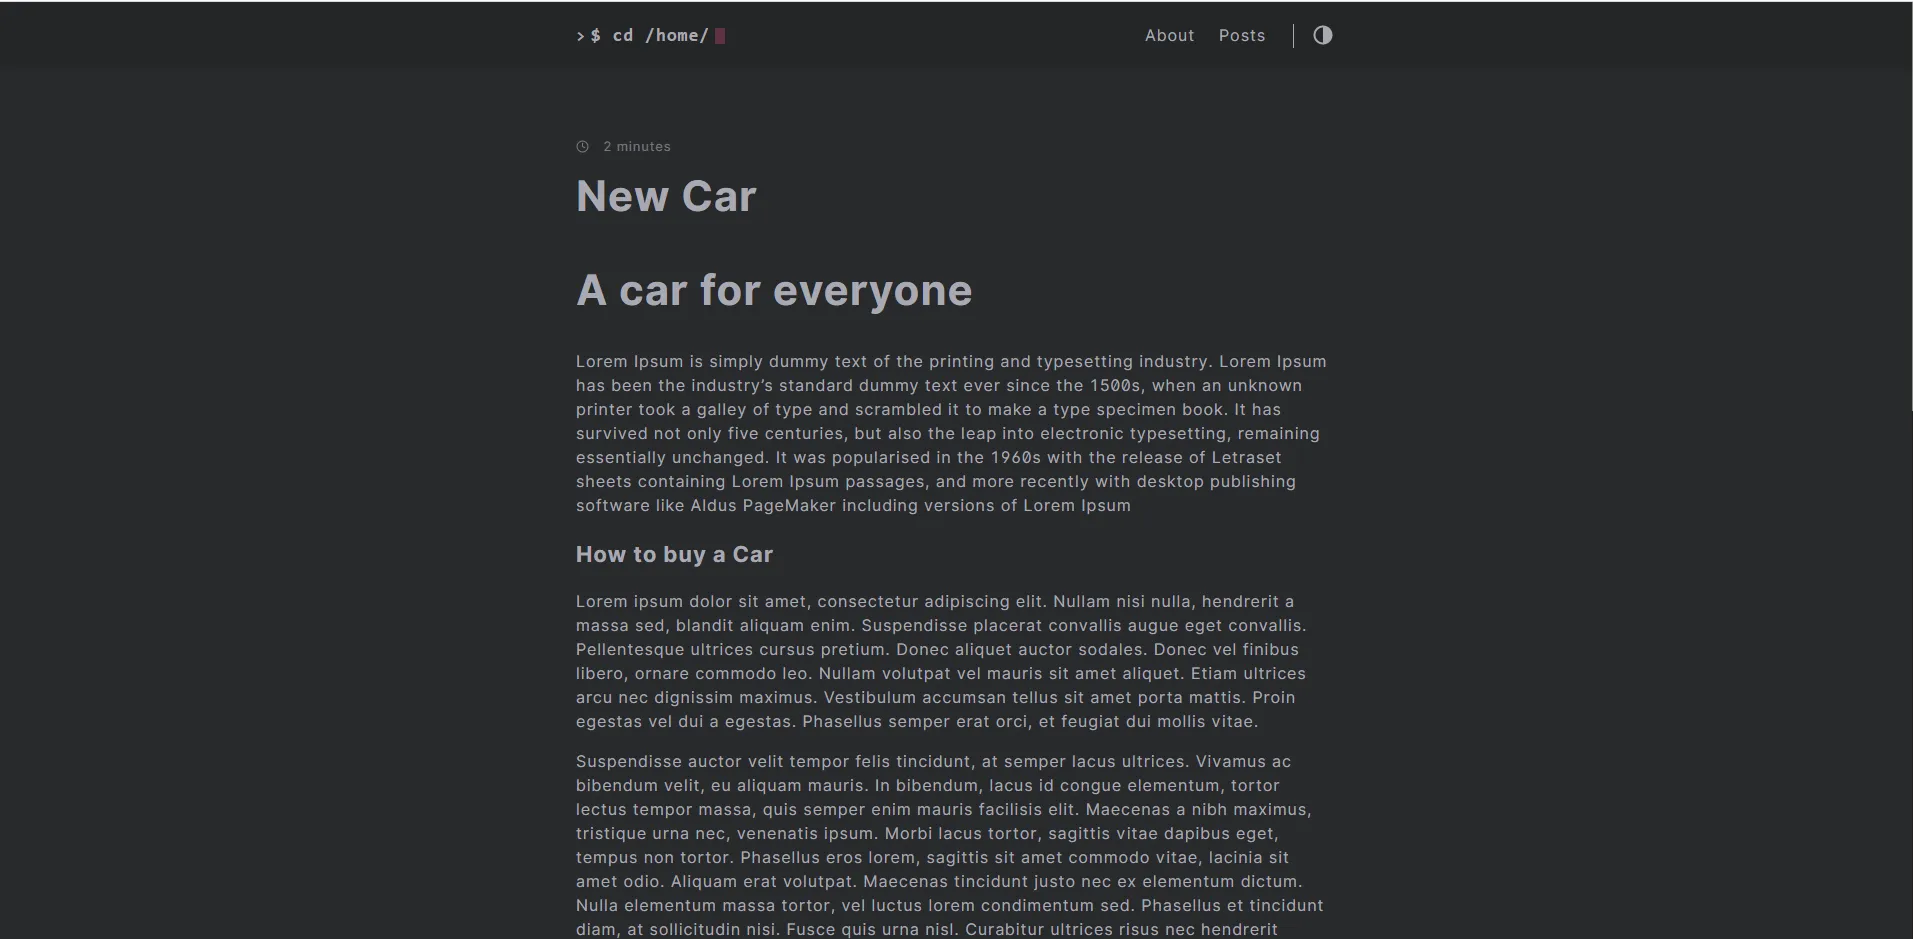
What your newly added content should look like!
Let’s assume at this point that you are satisfied with the content and have everything you want out of your theme. Let’s push our content up to our Gitlab repository.
|
|
And on that note, let’s jump into Netlify to deploy our application!
For demonstration purposes we will not do any customization but the expectation is that you will customize the theme and content for your individual project. Always visit the theme’s Github repo to learn how to customize the theme.
Deploy your application
In Netlify, go ahead and log in and click on “New Site from Git”
After clicking on “New Site” you will be taken to a screen where you will select the Git provider for your code. If you have followed along and used Gitlab then go ahead and select Gitlab. You will be asked to give Gitlab access to your account and will have to log in. Once that is done you will be presented with a list of all your projects. Go ahead and select your project name, in this example my project is called my-portfolio-example.
The next page allows you pick the git branch and and other related settings to our build process. Go ahead and stick with the defaults and click on “Deploy Site”.
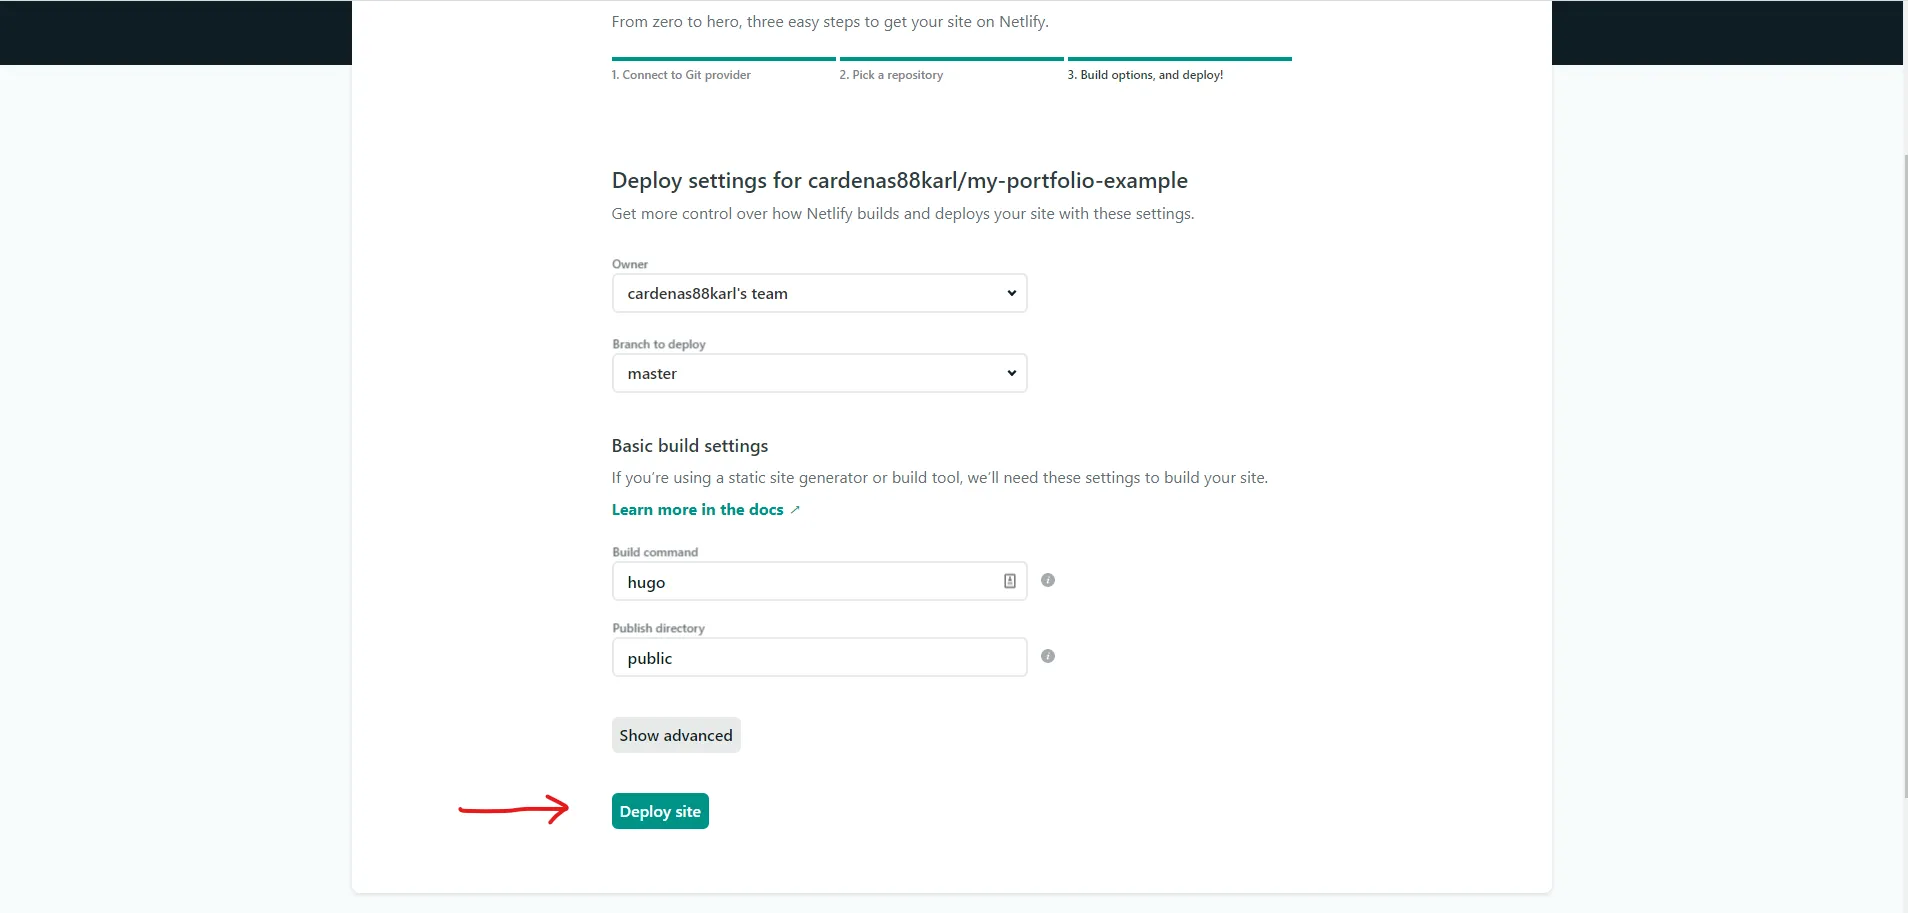
Taking the defaults for Hugo
Clicking on the deploy site will launch the build and deploy process. This is one the main benefits of Netlify. The build and deployment process is automated, taking a lot of the technical heavy lifting of your back. The end result will take you you back to the main landing page but this time you will have a link to your new website. Go ahead and click on the link and visit your first portfolio!

Back to main site but with a link to our site!
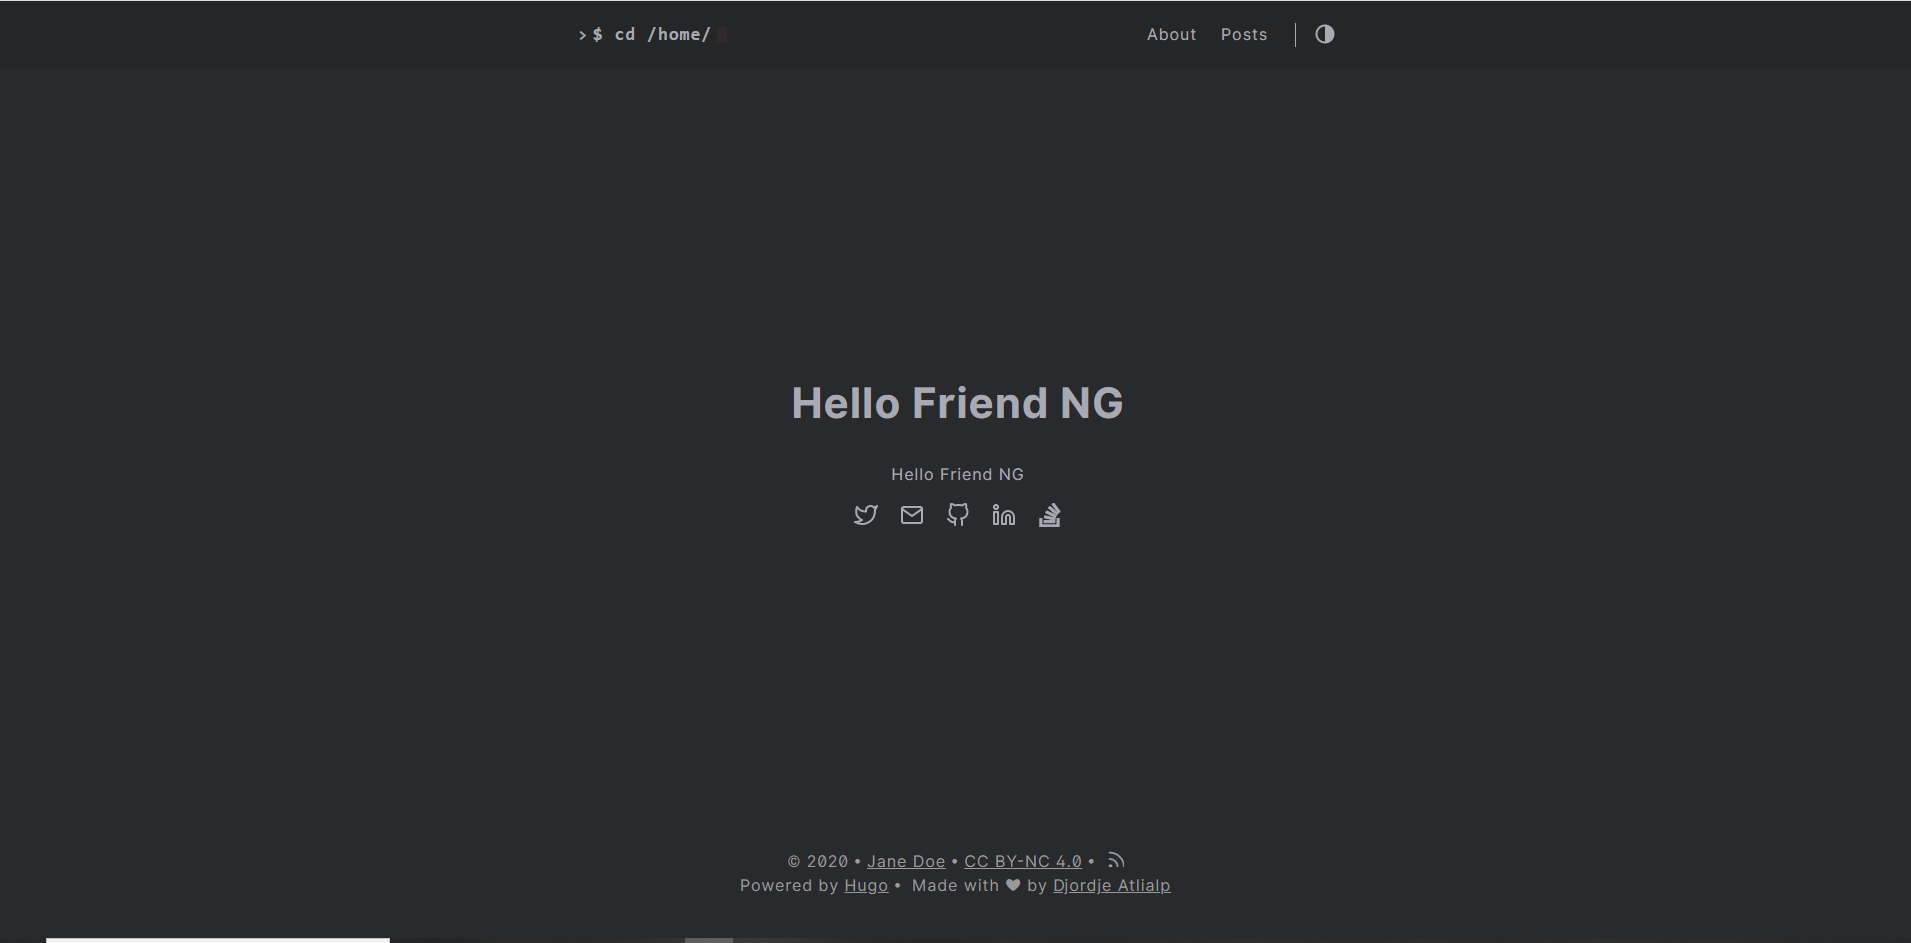
Working site hosted in Netlify
Important: If the build fails it could be due to the Hugo version Netlify auto selected. Create a netlify.toml and specify the desired Hugo version. Ideally, you would specify the same version that you have installed locally. You can find the latest Hugo release here. In the example repo you can find an example of a netlify.toml configuration.
|
|
Adding a custom domain name
As you probably have realized by now is that the url name generated by Netlify is not very user friendly. It probably has some random funny names followed by odd numbers and characters, like this one https://romantic-brown-3b847a.netlify.app/ 😝
This is where a custom domain name comes into play, if you don’t want the auto-generated url then we need to provide a custom domain. If you bought a custom domain earlier and followed the registration steps for domain management in Netlify then keep on reading, otherwise I encourage you to re-visit the “Getting a Domain Name” section earlier in the article.
In the main Netlify page, click on “Domain Settings”. If you added a custom domain earlier then make sure that the the domain(s) are listed and available. In the example below, you can see that my domain name crazykarlcodes.dev is listed and available.
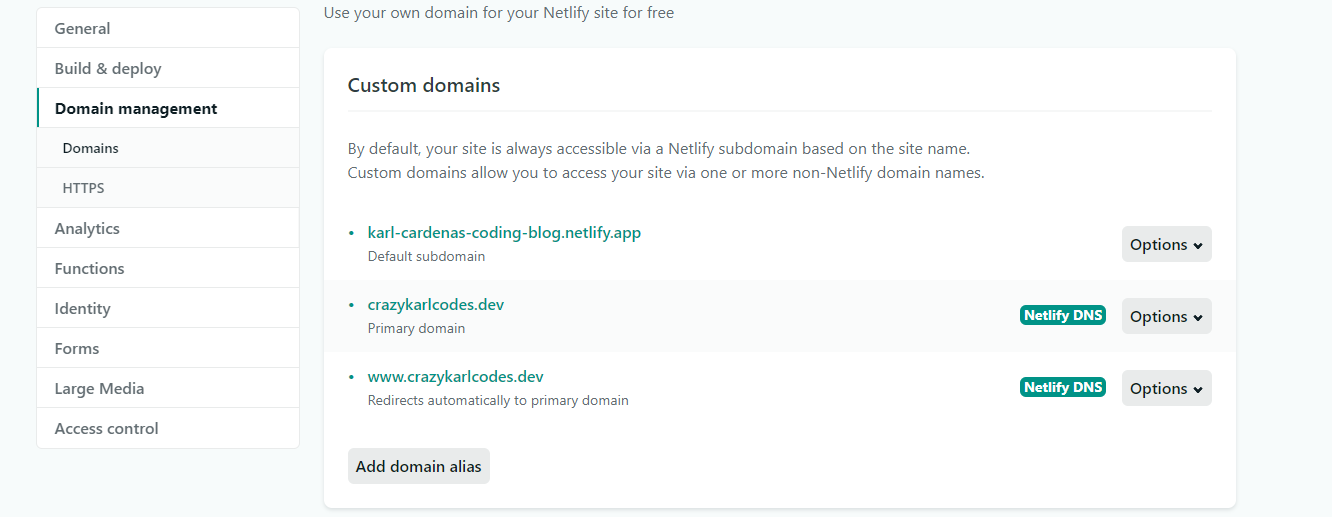
Example domain names
In the file config.toml make sure the the baseUrl setting is pointing to your desired domain name. Example: baseURL = "https://crazykarlcodes.dev/" This is an important step because otherwise you might encounter come content failing to load due to invalid CORS settings. If you need to make the change, simply go back to the code editor and open up the config.toml file. Push your changes up to Gitlab when you are done.
|
|
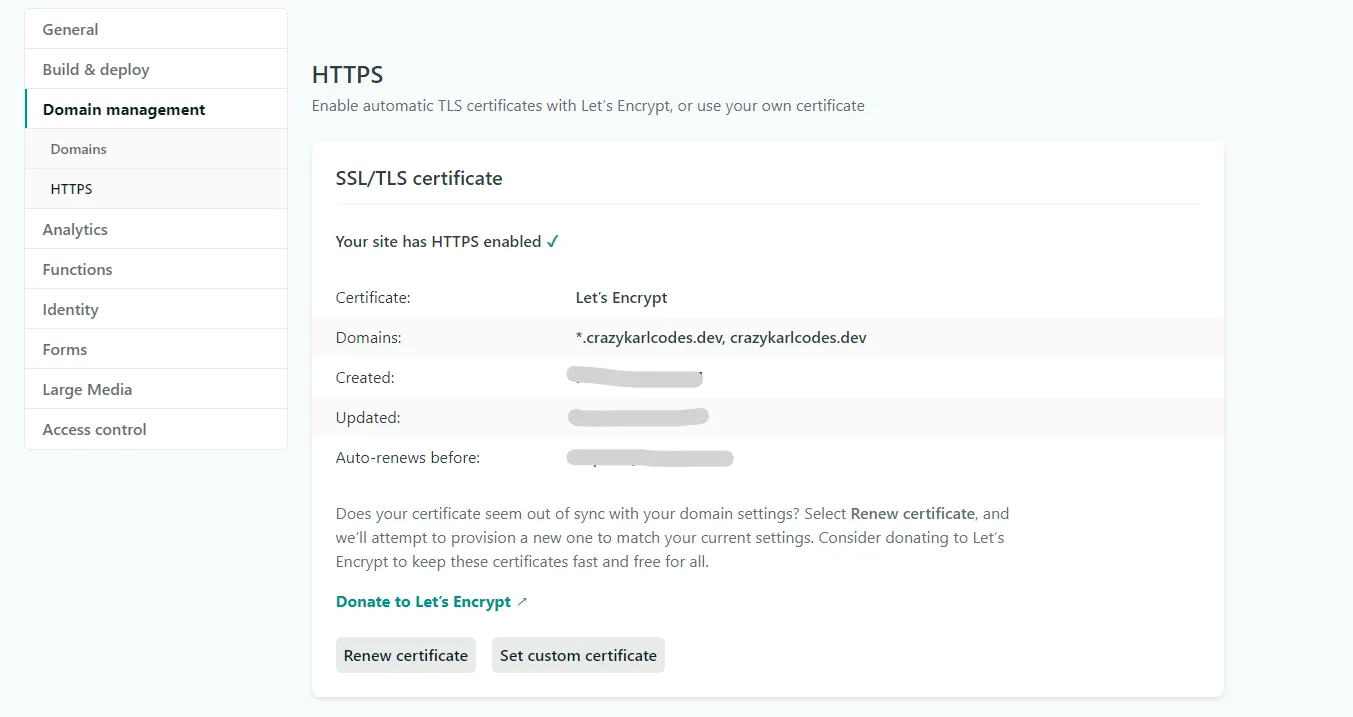
The last step is to configure the website for HTTPS traffic. This is to make sure the content is encrypted, otherwise most modern web browser will give the user a scary warning advising them to avoid the website due to lacking encryption. This is a good thing in general but bad for our website so let’s make sure we avoid this situation.
In the same settings page for adding a custom domain, scroll down to the bottom. You should see a heading named “HTTPS”. Click on the button to add a TLS certificate. This will use DNS validation to make sure you own the domain. This is normally a pretty quick process but can sometimes take some time ( > 30 min ). Once the certificate is created, go ahead and visit your website using the custom domain. Another great feature of Netlify is that this process is automated and free. This is normally a highly technical process and often cost money. You can thank Netlify and Let’sEncrypt for making this a free feature.
If you encounter some issues checkout Netlify’s debugging site.
This is only the beginning, at this point you have all the tools available to start customizing the content, look and style of your digital portfolio. Go back and visit the documentation for your selected theme and start learning the many amazing features that Hugo provides out of the box. Go look at other themes and example codes to see how others are using Hugo.
If your theme does not have a feature or perhaps does not meets your requirements then checkout other themes. It’s also possible you might have to customize an existing theme or create your very own Hugo theme. Creating your own Hugo theme is certainly a bit of an advanced topic but if you were able to get to this point then I have no doubt you have it takes to learn Hugo and create your own theme.
I hope you found this useful and wish for you new digital portfolio to bring great new opportunities for you! Feel free to checkout my digital portfolio for inspiration, it may look familiar to what we worked on 😉